Showing posts with label CPS. Show all posts

Tuesday, May 15, 2012

Using CPS and Audacity to Create Read Aloud Tests

There are times when test questions need to be read aloud to students. Since you can add audio to questions in CPS, it occurred to me that a teacher could use Audacity to record themselves reading the question.  That would allow the student to simply click a button to hear the question read to them. The test can be given as a teacher lead test with the student setting the pace. All the teacher would need to do is start the test and then let the student take it from there.
If you have ever used Audacity before, I think you will agree that it is relatively easy make a recording. Each question would only be a minute or two. Just remember to export the recoding as an mp3 file. Then you would add the recording to each question individually.

To add the recording to the question in CPS, choose “notes and media” from the question drop down (in the options area of the question). Click on the audio/video tab in the question note window. Click browse and navigate to your audio file and double click it. Click “ok’ in the CPS – fine details window. Then click “save & close”. Click save and close (two separate buttons this time).

To give the test., click on the engage tab. Put a check next to the name of the lesson (test). Click the engage button. Remember, the test will have to be teacher lead since the student will have to hear the audio. At each question the student can click on the notes button to listen to the audio.

Friday, April 13, 2012

Using CPS Verbal Engage Questions and ActivInspire Expresspoll for Formative Assessments

When teachers ask students questions in class without the use of Student Response Systems such as CPS or ActivExpressions, do they receive an accurate assessment of whether or not the students truly understand what was covered in class? Student response systems allow students to remain anonymous and therefore permit all students to respond without worry or concern.  Teachers can ask questions that require more thought provoking text responses from the students.
CPS users have a choice of a large screen where teachers can type the question they want to ask the students or a smaller response bar that can be placed anywhere on the screen. To change the setting from a large screen to a small response bar, choose “delivery options” from the settings menu. Teachers then have the option to check or uncheck the “show large screen” box in the verbal questions section of the delivery options window. Once that is done they would click “verbal engage” from the “engage” tab and choose “short answer” or “essay answer” depending on the character response they want from their students. Short answer has a maximum of 40 characters and essay answer has a maximum of 120 characters.


ActivInspire users would open the expresspoll from the main toolbar and choose text response “ABC”.


Thursday, November 17, 2011

Importing Lessons or Tests from Other Databases

It’s a good idea to create and share tests among co-workers. Why should each teacher create their own work and not share it with others. This is very easy to do in CPS. However, be sure you are working from your single database and share it with one shared database. If you are working with too many databases, you will start to get confused and loose tests. Remember, it’s best to keep your database on the C drive of your computer. The shared database can be stored on a school file server or in the cloud somewhere that all teachers involved has access to. When you import the tests to your database or the shared database, it works best if you copy the shared database to your C drive. Just remember to keep the shared database on the file server (or cloud) current.
Be sure the CPS version you are using is at least 6.70. It is also very important that everyone who is sharing items all have the same version of CPS.
So let’s say someone has imported a test to the shared database and you want to add it to your CPS database. Open your database and click on the “prepare” tab and “lessons and assessments” sub tab. Click “import”. Select the shared database that you copied to your C drive. Click on the plus sign to the left of the shared database name. You will see all the lessons or tests in that database. Put a check in the tests you want to import and click “ok”. You will see the test you imported at the bottom of the list.


Thursday, October 20, 2011

Adding a PowerPoint File In a CPS Test

A lot of teachers use PowerPoint. For those PowerPoint users that also use CPS, I just wanted to let you know that you can create a test in CPS (CPS calls them lessons). It’s very simple. Click on the “prepare” tab and the “lessons & assessments” sub-tab. Click the new button and choose “lesson”. Name the test and click “ok”. Click on the name of the test and choose “PowerPoint File” from the “add file(s)” drop down.


Navigate to and open the PowerPoint presentation you want to add to the test. Now click the “engage” tab and the “lessons & assessments” sub-tab. Place a check in the box to the left of the PowerPoint test you just created and click “engage”. Your PowerPoint file will open and the CPS program will scan for your receiver. The type of test will look very much like a “verbal engage”. You will be able to advance the slides or for that matter right click and go to a previous slide or any slide. Click the verbal button to choose the type of question you want. Remember, a verbal engage starts right away. I hope that helps.

Friday, September 16, 2011

New Year, New CPS Database

When you begin using CPS another school year you should create a new database. I tell teachers it’s not a bad idea to name your new database your name and the school year. So for example, I would name my database Brian_2011_12. For those of you that are new to this CPS database deal, let me explain what a database is. You create a CPS database the very first time you open CPS. You only create one for the entire school year. This database contains all the classes, students, lessons (or tests), fastgrade test keys and challenge boards you create during the entire year. That way you can easily see when the databases were created. You should never delete your old databases. This is so you do not have to create all your lessons, fastgrade tests and challenge boards all over again. That would be a bit insane.


Once you create your new database, click on the “prepare” tab and the “lessons & assessments sub-tab”. Click the import button. Click the browse button to browse for your database. In the next window, you will see your selected database. Click the plus sign next to the database name and put a check in the lesson (test) boxes you want to import.

Wednesday, June 22, 2011

Creating and Engaging CPS Performance Questions


A performance question is an open-ended or subjective question that requires a specific response, usually in the form of short answer or essay. A rubric is a tool associated with a performance question that allows the instructor to divide the total number of points available for that question into distinct categories. For example, the points for a 10-point essay question could be divided into four categories worth 2.5 points each: grammar, punctuation, content, and persuasiveness. A rubric can not be used to give additional weight to a specific question. The student has a maximum of 140 characters for their answer.

The first step to setting up a performance question is to decide how many categories there should be and what those categories should be titled. Once you know that, it's time to create the rubric to show those categories. To create a new rubric, follow these directions:
• Click the settings menu.
• Select performance question rubric wizard. The CPS performance question wizard appears.
• Check the create new rubric box, in the new rubric section. (Note: This option does not appear if this is the first rubric created in the database.)
• Click next to continue.
• On the next screen, fill in the rubric name box.
• Choose the number of categories from the total number of categories pull-down menu.
• Click next to continue.
• Type in the names of your categories, or leave the default names.
• Click next to continue.
• Verify that the information you previously entered is correct. Click back to edit the information or next to save the information.
• On the final screen, click done to save your rubric and return to the prepare - lessons and assessments tab.

Once you have created your rubric, you are ready to create the performance question to go with it:
• From the question author window, select performance question from the top drop-down box in the format section.
• Select the rubric you want to associate with this question.
• Save the question by clicking either the save button or the save and next button.

Performance questions and their associated rubrics can also be added from within the fastgrade window.
• In the performance section of the fastgrade window, click the rubric button to create a new rubric to associate to your question or select an existing rubric from the drop-down list.
• With the rubric selected, click the add button to add the question with its associated rubric.

If you need to edit a rubric after you have created it, you can do so from the performance question rubric wizard:
• Click the settings menu.
• Select performance question rubric wizard.
• Select the rubric you want to edit from the list of existing rubrics in the existing rubrics section.
• Click the radio button next to the edit option.
• Click next to continue.
• Edit the rubric name and/or total number of categories (from 1 to 25).
• Click next to continue.
• Edit any of the category names.
• Click next to continue.
• Verify that your rubric information is correct: click back to change the information or next to continue.
• Click done to save your rubric.

Once you have created your rubric, it's time to use it. To do so, simply make sure that at least one person gives a response for the rubric question as the session is being administered. As with all CPS questions, the performance question must be started, and at least one response must be registered for the question. If no responses are recorded, the question is automatically excluded from the session report and the grading calculations.

The assigning of points for performance questions happens after the session has ended:
• From the reports section of the report tab, select the session containing the performance question you want to grade and click the edit button.
• From the assessment options window, click the re-grade students button.
• In the re-grade window, you will see that instead of the standard checkbox, the performance question will have multiple columns, and those columns will have numeric values. When you have entered values for each of the students, click ok to return to the assessment options window and then click ok again to return to the reports tab.

Tuesday, April 26, 2011

Creating A CPS Challenge Board

A CPS Challenge Board is very similar looking to the Jeopardy game. In order to create a Challenge Board, you must use questions that you have already created in lessons or questions that you have imported from ExamView. After you have chosen which questions and categories you want to use, the next step is to create the Challenge Board. Click the prepare tab and the team activities sub tab. Now click new. Type a title for your activity and a title for each category. Once you click ok, a Challenge Board window opens that includes your database in the upper left portion of the window, your categories and the point values in the upper right and the questions in the lessons (once selected) in the bottom. Click the plus sign next to the name of your database to see the lessons (we call them tests). Click on a lesson to see the questions displayed in the bottom half of the Challenge Board window. Just drag and drop the questions to the point value buttons in each category. You can have more than one question in one point value. So for example, you can add 5 questions to the 50 point value button for the North Carolina category. The number of questions you drop into a point value is completely up to you of course. Each button under the category contains 2 numbers. The first number is the point value. The second number represents the number of questions you dropped into that point value.


To engage the Challenge Board activity, click on the engage tab and the team activities sub tab. Click on the name of your Challenge Board and click the engage button. Choose your class from the dropdown in the window that appears and click start. Click on a point value in a category of your choice and the question will appear on your screen. Click start and let the competition begin. Once the students or teams have entered their answers click the close button on the question window to return to the Challenge Board. Continue clicking the point values in the categories until the students or teams have finished all the questions in the Challenge Board. Choose “show score” from the settings menu to see the score. It is displayed in the middle of the Challenge Board. If you want to break your class up into teams you will have to create a separate team class and create students called for example, team 1, team 2, etc.
Don’t forget that you can also set the timer to auto start once a question is started. You can do this in the Challenge Board by clicking the options menu and checking “auto start the timer”. For that matter, you can also auto start the question in the same manner.

Monday, April 25, 2011

Sign eInstruction's Pledge To Go Paperless On Earth Day

If you sign eInstruction's pledge to go paperless on Earth Day, you will be entered to win a Pulse CPS classroom set http://forms.einstruction.com/forms/earthday?redirect_src=/pledge. If you use the CPS in your classroom, you will never have to use paper to make copies of the tests for your students again. Nor will you have to create answer sheets or use the costly Scantron sheets. You can have the students answer each question together or let them take the test at their own pace. You can also create multiple versions of the same test. One of the best features of CPS is that the test is graded as soon as the last student finishes their test. CPS is not solely used for taking tests. It can be used to review before a test or to review after the test. The Classroom Performance System can be used to get a sense of how the students feel about a topic that is being discussed in the class. The structure of learning is pyramid in nature. In other words, if students don't understand what they learned today, they will be lost in tomorrow's lesson. Asking the students if they have any questions about what they learned today, will most likely not reveal the true nature of what they don’t understand. The CPS can be used very effectively to accurately know if they are ready to move on or not. This can be done by having them answer 10 questions or so. If the questions are not graded, there is no pressure and their answers will be honest. Another way to involve your students in the learning is to create a Challenge Board in CPS. It is similar to a Jeopardy Game. You can break your class into teams and bring out their competitive nature. Save a tree and help reduce the paper budget but more importantly have fun and make your assessments be more effective.

The winner will be notified by email on April 21st.

Updating the Firmware On the eInstruction Pulse Remotes


There have been firmware updates to the RF receiver for the Mobi wireless tablet and firmware updates for the Mobi tablet itself. There also have been firmware updates for the CPS Pulse RF receiver. The Pulse remotes also have firmware updates. That is what this blog is about. This update allows a user to enter more than 20 characters to answer an essay question in CPS using the Pulse remotes. The process is relatively fast unless you have many sets to update. The first step is to see if you need to update the firware on the remotes you have. You can find out what version you are running on your remotes by pressing the menu button (located at the top of the remote), then press the right arrow key six times until you see “diagnostic”, then press send (the key below the menu button). The old version firmware on the remotes is 00.47. The new version is 00.54.

Ok, here is the update process. First of course make sure you have the RF receiver plugged in the USB port of your computer and turn on all the remotes. Also, make sure that the RF receiver and the Pulse remotes are on the same channel. Click on the eInstruction icon in the system tray and choose “eInstruction Device Manager”. Right click on the icon for the Pulse RF receiver and choose “properties”. Press the control and shift keys at the same time. You will see two more tabs appear, “update keypads” and “update base”. If you haven’t updated the firmware on your RF receiver, click the “update base” tab and update the RF receiver. Click the “update keypads” tab to update the firmware on the remotes. Click “browse”, select the 0.54 folder and click “open”. Select “English Pulsestring” and click “open”. Click “update”.

You will see a message “You are about to upload new firmware to your Pulse keypads. Do not remove the USB receiver during this process. If you are sure you want to continue, select ok, otherwise choose cancel to abort the update.”

The next step is: “Manually join all CPS Pulse clickers to channel 21 by pressing digits 21 (your channel may be different) on each clicker and then pressing send. When all clickers have joined, press ok.”

The next message displayed is: “The firmware update is currently being sent to all CPS Pulse clickers. The clicker LCD may display blank during the update, please wait until all clickers read powering down and have powered off completely and then press ok to continue.”

The last message you will see is: “The CPS Pulse firmware has been successfully updated. Press ok to end the update process.”

I hope that helps. Thanks.

Combining Gen 2 and Gen 2 Pulse Remotes Together


Some schools have different versions of the CPS system. If your school has Generation 2 CPS remotes (shown here on the left) and Generation 2 Pulse CPS remotes (shown here on the right) , you can combine them to use with a large group of people. You are only going to use one RF receiver. Now you might think that you would use the newer Pulse RF receiver, but no. Plug in the Generation 2 RF receiver in the USB drive of your computer to receive the signals from the remotes. The next thing you will have to do is change the channel and the clicker # of the Pulse remotes. Plug the Generation 2 RF receiver in the computer. Wait for a few minutes to let the computer and the Device Manager recognize the RF receiver. Click on the Device Manager in the system tray and choose eInstruction Device Manager. Right click on the icon for the CPS Generation 2 and choose properties. The base channel the RF receiver is using will be listed on the general tab in the lower left portion of the window. Write this down. Now you will have to turn on every Pulse remote and change the channel and clicker number. To do this, press the left and right arrow keys together, and immediately press the + - sign button. Enter the new channel number and press the return key, enter the new clicker number (33 instead of 1 for example) and press return twice. This will turn the remote off and store the new information. It is a good idea to tape a piece of masking tape on the top of the remote with the new remote number so that you can keep track of them. I hope this helps someone.

CPS Items You May Encounter

I have received a number of questions dealing with the following things so I thought I would write a blog about the answers to these questions so that it might help someone. First of all when you open CPS, if your database is on a flash drive or somewhere other than the C drive, you will encounter the following message.


This message is fine. Just click yes to continue through the process of opening your database. If you click cancel, you will exit out of CPS. The best thing to do of course is to save your database on the C drive. You can copy your database to a thumb drive to work on it at home. Just overwrite the database to the C drive the next morning.

If you ever want to update the CPS or Workspace software, don’t forget to uninstall CPS, Workspace and the Device Manager in the Control Panel. These new versions are supposed to update without removing the older versions but you still need to remove the old before installing the new.

If you have Smart Board software on your computer and you’re not using it, uninstall it. The Smart Board software takes up the unused ports on your computer. This prevents your CPS RF receiver from being detected by the Device Manager. eInstruction emailed a site to me to download a program that clears a port for the receiver. The website is: http://www.ftdichip.com/Drivers/VCP.htm. I downloaded the 2.08.02 file to clear a port. Restart your computer and plug in the CPS receiver before the computer starts up.

When you want to give the students a test, select the “engage” tab and the “lessons & assessments” sub tab. You need to put a check in the box next to the test you want to give your students. Then click the engage button to give the test in the teacher lead mode. However, if you have the generation 2 or the generation 2 Pulse remotes, you also have the option of giving the test using the student paced mode. I think I discussed these modes in an earlier blog. If you want to give two or more versions of the same test, place checks in the boxes to the left of the tests and click engage. I think I blogged about this earlier too.

I hope this helps you out. Thanks for reading the blog if you made it this far. If you stopped at the title, I understand.

Updating Your Pulse RF Receiver Firmware

If you are using eInstruction’s CPS Pulse in your classroom, you will need to update the firmware on the RF receiver. That’s the thumb drive looking item you plug into the USB port of your computer. It’s used to communicate to the CPS. If you also use the Mobi on the same computer, it would be a good idea to plug them each directly into one of the computers USB ports. You shouldn’t plug them both into a USB multiport mini hub. By doing this, both receivers will compete with each other. Also, keep in mind, signal strength is lost with the additional wire length. An analogy I use in my trainings is, “Imagine hooking up multiple T connectors to a water hose. The water pressure at one of the hose ends will not have anywhere near the pressure as the original hose end.” I also wanted to let you know that there are updates to the Workspace Mobi (8.84.0001), (CPS 6.59.0018) and CPS for PowerPoint (6.59.0018) programs. They were new in October. The update mainly occurs in the Device Manager but since this is the software that connects the RF receivers to the devices, it’s a good idea to do these updates.

Ok, enough of the rambling. Although I hope you found it useful. Here is the process of updating your Pulse and Mobi firmware.
1.) Open the Device Manager and plug in the receiver you are going to update.


2.) Select the appropriate receiver in Device Manager, and go to file and preferences.


3.) This will open up a dialog box , choose the firmware update tab. Click “check for updates”.


4.) You will be told firmware updates are available. Click ok.

5.) Click next on the confirmation screen, and you will see a list of firmware updates for your device.

6.) If the current version is the same as the available version, choose cancel. Otherwise continue.

7.) Check the box in the device column. Click update, and then click ok on the confirmation screen. A progress screen will open.


8.) When the process completes, the following screen will display with the message “firmware update complete”.

9.) Click finish.

10.) Unplug the receiver.

11.) If you have another receiver to update, return to step 1 and start the process again with the next RF adapter.

Note: If you have plugged in multiple RF receivers, it's a good idea to open the Device Manager and right click on the devices you no longer have plugged in and choose remove.

Engaging Multiple Versions of The Same Test In CPS


Engaging multiple versions of the same test is only possible using the generation 2 or Pulse remotes. These are the remotes that have a display window. Teachers must engage the tests in the "student paced " or "student practice" mode. They cannot engage the test in the "teacher led" mode using two versions of the same test. You must also give the students a printed copy of the test.
First, you will need to create two versions of the same test mixing the questions and the possible answers. Then name the tests the same name adding version 1 and version 2 for example. However, if you choose, you can give the students two completely different tests at the same time.
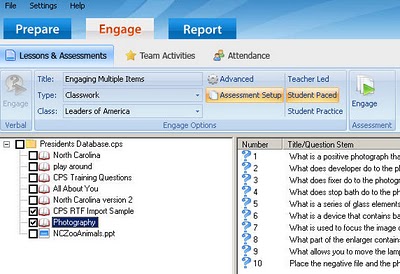
Now click the "engage" tab and the "lessons & assessments" tab. Put a check mark in the box to the left of the tests you want to engage. Click "assessment setup" in the engage options group. Then click either the "student paced " or "student practice" mode and "engage" in the assessment group to engage the test. You will see a note telling you to turn off the projector and turn on all the remotes before you click "start".
The students will have to enter the test number, either 1 or 2 before they can start to answer the test questions. Your computer will display a window that shows what every student enters for an answer, how many questions they have attempted so far and the number of answers correct. After all students have completed the test, the teacher clicks "end".

Importing a Test Typed In Microsoft Word In To CPS

We all have tests typed in Microsoft Word but if you are using the Classroom Performance System to give a “teacher led” test to your students, it would be nice to have the test typed in CPS. But do you really want to type the test all over again in CPS? No, you probably don’t. You do have the option to print the test out and use the “Fast Grade” option in CPS to give the test to your students using the “student paced” or “student practice” mode. However, that’s not paperless. CPS offers you the ability to give your test totally paperless on Earth Day (April 22, 2010) for example. You don’t have to print the test out or use Scantron sheets and the test is graded immediately once the teacher clicks the end button.
The first thing you have to do is to format your Word document so that CPS recognizes it. Then you will need to save it as an RTF file. The following is the way your test must be formatted:


The next step is to open CPS, click on the “prepare” tab, and the “lessons & Assessments” tab. Then click the “import” button on the lessons group. Click the “browse” button in the CPS – Import window. Choose “rtf file” from the file type dropdown. Navigate to the rtf Word file and double click it or choose open. Now you will see your test listed under your database.

Adding Video or Audio to CPS Questions


We always create questions in the assessments we give to our students to test their knowledge of the content we hope they have learned and understand. What if we could add audio or video files to those questions to give them a deeper understanding of the content we are asking them about? You can add a video or an audio file to the questions in CPS. Here is how that is accomplished. Open CPS, (version 5.6) and click on the prepare tab. For this example, I’m going to go with the fact that you already have typed your questions. Click on the lesson (test) name you want to edit the questions in. The questions in that test will be listed on the right side of the window. Double click the question you want to add the audio or video file to. In the options area choose “notes and media” from the question drop down. Click on the audio/video tab in the question note window. Click browse and navigate to your audio or video file and double click it. Click “ok’ in the CPS – fine details window. Then click “save & close”. Click save and close (two separate buttons this time).
Now you are ready to give the test. Click on the engage tab. Put a check next to the name of your lesson (test). Click the engage button. The test will have to be teacher lead since the students will have to either hear the audio or watch the video. Click on the notes button and select your video (or audio). The video will play and your students will then answer the question.

Adding Graphics to CPS Questions


Have you ever heard the expression “A picture is worth a 1000 words”? I guess I became a photographer because my typing skills leave much to be desired. But that is beside the point. Pictures or graphics can help students understand more fully the question you are asking them. Pictures or graphics can be added to CPS questions in either the question or the answer areas or both. Ok, so open CPS, (I’m using version 5.6) and click on the prepare tab. Let’s say you already have typed your questions. Click on the lesson (test) name you want to add questions to. The questions in that test will be listed on the right side of the window. Double click the question you want to add pictures to. In the format area choose template → add graphics → question graphic. You actually have 13 places you can add the graphics to. You can add the graphic to the question on the right, middle or bottom areas. The graphic can be big or small. The graphic can be added to the answers only or the answers and the question. I chose to add it to the question for this example. In my example, I see the text “352 x 228 Image – Click to set”. This information is telling me that my image space is 352 x 228 pixels. Now right click in the area for the graphic and choose browse. Navigate to the image you want to add to the question and double click it. CPS resized my image to make it fit in the graphic area. If it didn’t, PowerPoint could be used to resize your images if you didn’t have an image editing program like Photoshop. Now click save and close. That’s it, you’re done!

Adding Response Pads To Your CPS Set


You may have a set (32) of CPS response pads in your classroom. However, if you have more than 32 students in one class, you will need to add more clickers. As I said in an earlier blog, the use of this response system in your classroom allows you to understand how much your students know or don’t know about the subject covered in class. You can even use the clickers to review before or after the test. You can have your students take the test using the remotes, eliminating the need for scantron sheets. However, if you have a class that is larger than 32 students, someone has to enter their answers on a sheet of paper (boohoo). Studies have shown that the instant feedback that students receive from these response systems help them learn much better. So, how do you add response pads to your set to increase the number to fit your largest class size? Well I’m glad you asked that question because that is what my blog is about. You will not find this in the help menu of the CPS software.
There are basically two main things that you have to do in order to see the extra response pads, clickers or remotes as they are sometimes called. The first is to change the channel that the extra remotes use to communicate with the RF receiver. They have to use the same channel of course that your set is using. The next thing you have to do is to change the remotes ID number. So for example, if the remote you have stolen or borrowed is number 31, you will need to make it number 33.
So let’s start. Let’s say you have already entered your classes and students. Some of your classes are larger than 32 of course. Open the CPS software and choose “Delivery Options” from the settings menu. Click the “Feedback Grid” tab. Move the slider from 32 to 64 under “Number of Pads for Question Preview”. Now take one of your response pads and (with the power off) press both the left and right arrow keys together. Then very quickly press the + - key. This will show you the channel your clickers are working on. Let’s say for this example it is channel 19. Now take one of the response pads you want to add to your set. Again, press both the left and right arrow keys together (with the power off). Immediately press the + - key. This again will show you what channel the other set is working on. Enter your channel number (19) and press send. The next screen will ask for the address. This is the clicker number. You are adding to your existing set of 32, so enter the number 33 and press send. Press send again to turn the display off. Do this for the rest of the response pads you want to add to your set. You can add more than 450 additional clickers to your set, but I’m sure you wouldn’t want that many students in your class! Remember, that’s 900 more parents as well! I would also write the number you assigned each of the additional response pads either on a piece of tape or by using a labeler so you don’t get confused which response pad is which. Plus you might want to return the clicker to the original owner.
So that’s it. It’s a very quick process. In basically two steps, entering the channel number and the clicker number (for each response pad) you will increase your set from 32 to 500. Enjoy and go paperless. The students will benefit tremendously!

Thursday, April 21, 2011

Using the Classroom Performance System in Your Class

I'm going to blog about the Classroom Performance System, otherwise known as CPS from einstruction. Smart Technologies has their version which they call the Senteo. Promethean also has their version called the Activexpression. Regardless of which response system you use, they can be used to increase classroom participation and performance. Even the shy quiet students can express their feelings and knowledge comfortably. The use of this response system in your classroom allows you to understand how much your students know or don’t know about the subject you covered in class. You can use the clickers, as they are sometimes called, to review before a test or a review after the test. You can even have your students take the test using the clickers, eliminating the need for scantron sheets. There are a number of ways you can deliver the test to the students. You can have each question displayed on the classroom data projector. In this manner the students would take the test one question at a time. Every student would have to finish the question before the class could move on to the next question. However, the mode you would most likely want to use is the student paced mode. In this mode, the students answer the questions at their own pace. The questions are not displayed on the data projector. Students would have a paper test in front of them. Students can also go back and review the questions before you end the test. As they go back to view a previous question, they not only see their answer displayed on the clicker screen, they also will see their second answer, if they changed it. So for example, if a student answered C for question number 6, but then changed their answer to D, they would see both answers displayed on the screen when they revisited the question again. The teacher asks the class if they are finished. Once the teacher clicks “end”, the answers are set and the test is graded. It’s that quick! The students would receive their test grade immediately after the class is finished. Receiving instant feedback is huge for the students! You will no longer be asked “have you graded the test yet?” There is also a mode called “student practice”. In this mode the students cannot move to the next question until they have answered it correctly. Their first answer however is the one that is graded.
Once you give the class a test, or lesson as they call it, you can preview or print one of 26 different reports from the collected student response data. Instructor summary will display the students’ names and grades. You also have a choice of item analysis, students study guides and many other types of reports.
You can also import your PowerPoint presentations into CPS. When you engage the presentation, the verbal toolbar is displayed at the bottom of the window. This will allow you to ask questions on the fly, record and chart the student responses.
The possibilities for the use of this response system in the classroom are endless and powerful. The bottom line is student achievement and participation will greatly increase and that’s what it is all about! Check them out and engage your students!